This post may contain affiliate links, including those from Amazon Associates. If you make a purchase through these links, I may earn a commission at no additional cost to you. Learn more about our affiliate policy.
Spring has a way of reminding us how temporary beauty can be.
A flower opens for a few days, sunlight touches the petals just right, and then the moment passes. Pressed flower wall art offers a way to preserve that fleeting magic and turn it into something lasting.
If you love the idea of decorating with nature but feel unsure where to begin, this project is an inviting place to start. It does not require expensive supplies or artistic training.
It simply asks you to slow down long enough to notice the details in a flower and arrange them in a way that feels meaningful.

Why Pressed Flower Art Feels So Enchanting
Working with flowers in this way reconnects you to the natural rhythm of the seasons. Instead of letting blossoms fade unnoticed, you preserve them and transform them into art that holds their shape and color.
There is also something deeply grounding about using your hands to create. Many people spend their days moving between screens, responsibilities, and endless ideas saved for later. A tactile project like this helps shift your attention back to what is right in front of you.
Pressed flower art also carries a personal quality that store-bought decor cannot replicate. The flowers might come from your garden, a walk through a park, or even a bouquet you brought home from the market. Each petal becomes part of a composition that exists nowhere else.
Choosing the Best Flowers for Pressing

Some flowers press beautifully while others hold too much moisture to flatten well. Choosing the right varieties makes the process easier and helps preserve color and shape in your finished artwork.
Flowers that are naturally flat tend to work best because their petals press evenly between paper. Look for blooms with thin structures and minimal moisture content.
Good flowers for pressing include:
- Pansies
- Violas
- Daisies
- Cosmos
- Buttercups
- Hydrangea florets
- Forget-me-nots
Greenery can also add beautiful texture and contrast to your design. Ferns, slender grasses, and herbs like rosemary or thyme press especially well and bring a natural woodland feeling to the composition.
When gathering flowers, choose blooms that are fresh and dry. It helps to pick them later in the day once morning dew has evaporated. Moisture trapped in petals can cause discoloration or mold during the pressing process.
Supplies for Witchy Pressed Flower Wall Art
The beauty of this project is how accessible it is. Most of the materials are easy to find around your home or local craft store.
What You’ll Need
- Fresh flowers or greenery
- Parchment paper, blotting paper or paper towels
- Heavy books
- Glass frame
- Cardstock or handmade paper for the background
- Tweezers
- Archival glue
- Small paintbrush or toothpick
Optional elements can add personality to your finished piece.
Black cardstock creates dramatic contrast behind colorful flowers.
Vintage paper gives the artwork an antique botanical feel.
A gold or brass frame can elevate the final presentation.
Step-by-Step Guide to Making Pressed Flower Wall Art
Creating pressed flower art takes a little patience, but the process itself is calming and rewarding.
Press the Flowers
Start by preparing your flowers for pressing. Place them between two sheets of parchment or blotting paper, making sure petals and leaves lie flat.
Slide the paper inside a heavy book and stack additional books on top. The weight presses the flowers evenly and removes moisture over time.
Leave the flowers undisturbed for one to three weeks. When they are ready, the petals will feel dry and papery while retaining their shape and color.
Here is a helpful walkthrough tutorial for this process from Bloom & Wild:
If you want to explore additional techniques for preserving botanicals, this guide on how to dry flowers and herbs for decor, crafts and ritual explains several simple methods that work beautifully for creative projects like this.
Arrange Your Botanical Design
Once your flowers are fully pressed, lay your background paper on a table and begin arranging them. Do not use glue yet. This stage is where you explore different compositions and discover what feels balanced.
Some people enjoy creating small wildflower bouquets, while others prefer a more minimal design with one striking botanical specimen. Crescent moon shapes, scattered floral constellations, and botanical studies can all create a magical aesthetic.
Take your time during this stage. Move petals and leaves until the composition feels harmonious. This moment of experimentation is often the most satisfying part of the process.
Attach the Flowers
When the arrangement feels complete, begin attaching the flowers to the paper. Use tweezers to handle delicate pieces so the petals do not tear.
Apply a very small amount of glue to the back of each flower using a toothpick or fine brush. Press the flower lightly onto the background paper and hold it in place for a moment.
Work slowly across the composition until every element is secured. The key here is restraint. Too much glue can damage delicate petals and disrupt the natural look of the artwork.
Let the Artwork Dry
Once the flowers are attached, leave the artwork on a flat surface so the glue can fully set. This step usually takes several hours.
Allowing the piece to dry undisturbed helps prevent petals from shifting or curling. Patience during this stage ensures that the finished artwork remains crisp and intact.
Frame the Botanical Art
After the glue has dried completely, carefully place the artwork inside a glass frame. The glass protects the pressed flowers while highlighting their delicate structure.
You can also choose to leave the glass off of the frame for a more rustic look, but know that your arrangement might not last as long.
Choose a location in your home where indirect natural light can illuminate the colors. Direct sunlight can fade petals over time, so a softly lit wall or reading corner often works best.
Framed pressed flower art looks beautiful on its own or as part of a small gallery wall. Even one piece can transform a space and bring a touch of nature indoors.
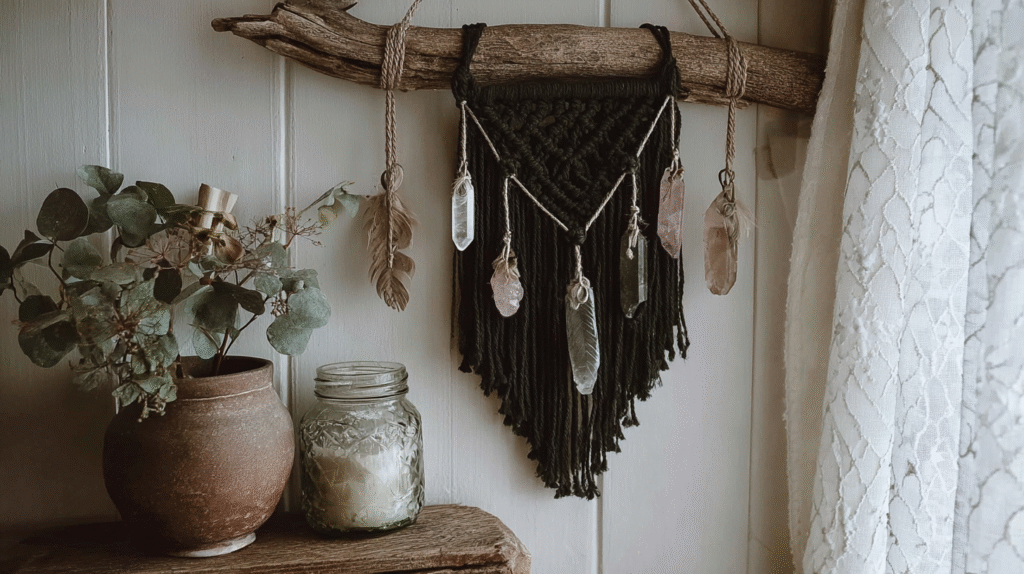
Witchy Design Ideas for Your Botanical Art

If you want your pressed flower artwork to carry a slightly mystical aesthetic, there are many creative directions you can explore.
- Moon Phase Design
Petals and leaves arranged around a crescent moon drawn with metallic ink, echoing lunar cycles and seasonal rhythms. - Herbal Apothecary Style
Medicinal plants such as lavender, rosemary, or sage displayed like a botanical study, with labeled herbs and a vintage naturalist feel. - Forest-Inspired Collage
Ferns, grasses, and tiny blossoms layered to reflect the texture of woodland landscapes, creating an organic, atmospheric composition. - Single Botanical Specimen Frame
One carefully chosen flower centered on the page for an elegant, timeless presentation.
Pressed flower frames are only one way to bring natural materials into your decor, and you can discover more inspiration in this collection of enchanting DIY nature crafts for witchy boho decor that use simple elements from the earth.
Styling Pressed Flower Wall Art in Your Home
Once your artwork is finished, consider how it interacts with the rest of your space. Botanical art pairs beautifully with natural materials and layered textures.
You might hang the frame above a bedside table beside a candle and a small stack of books. The combination creates a corner that feels creative and reflective.
Pressed flower pieces also work well in gallery walls alongside nature photography or botanical prints. Mixing different frames and sizes can add visual interest without overwhelming the space.
Another lovely option is placing the artwork near plants or dried herbs. The living greenery reinforces the connection between your decor and the natural world.
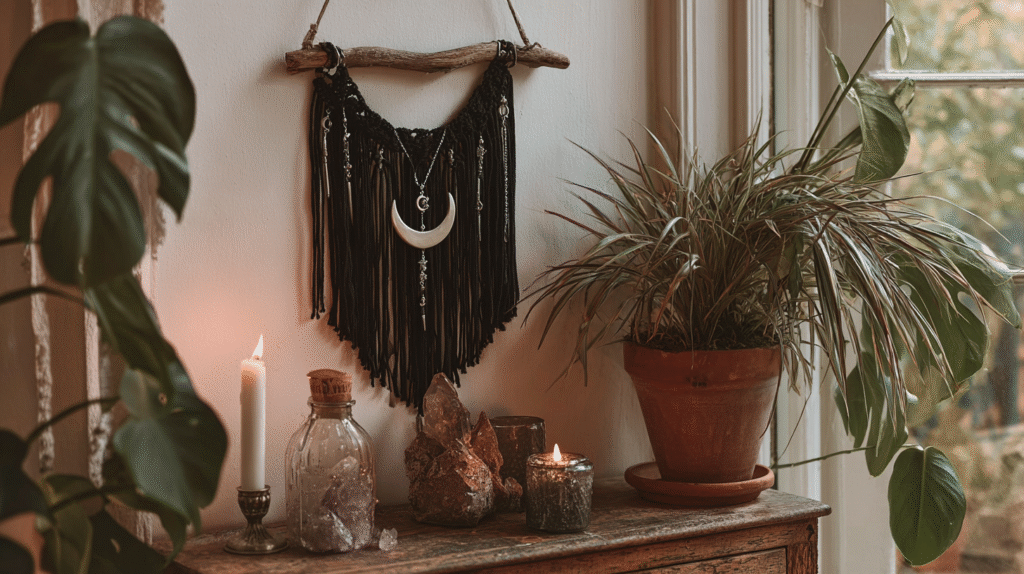
If you enjoy decorating with preserved botanicals, you might also like these ideas for beautiful ways to display dried flowers as wall hangings to bring more nature-inspired art into your space.
Preserving Your Pressed Flower Artwork

Pressed flowers are delicate, but with proper care they can last for many years. The key is protecting them from excessive light and moisture.
Avoid placing the frame in direct sunlight. Strong light can slowly fade the petals and alter their colors.
Humidity can also affect pressed flowers. Keeping the artwork in a dry indoor environment helps maintain its shape and detail.
If you plan to create multiple pressed flower pieces, store extra flowers between sheets of paper inside books. This keeps them flat and ready for future projects.
A Piece of Spring That Stays
Pressed flower wall art is more than a decorative craft. It is a way of noticing beauty before it disappears and honoring it through creativity.
In a world that moves quickly, taking the time to gather flowers, press them, and arrange them into art becomes a small act of presence. Each piece carries the memory of a season, a walk, or a moment when you chose to pay attention.
When you hang your finished artwork on the wall, it becomes a reminder that enchantment does not have to be distant or complicated. Sometimes it begins with a single flower and the willingness to see it differently.