This post may contain affiliate links, including those from Amazon Associates. If you make a purchase through these links, I may earn a commission at no additional cost to you. Learn more about our affiliate policy.
The woods go quiet in late October, and everything they let go of becomes an offering. Acorn caps, curled oak leaves, seed pods split open and emptied of their summer.
The best Samhain crafts are the ones you gather rather than buy, and the truest ones stay beautiful long after the veil has thinned and closed again.
Every project below begins on a walk and ends on a mantel, a windowsill, or an altar that carries you straight through to the winter solstice.
In This Post, You’ll Find
- Nine foraged projects built from leaves, twigs, pinecones, and seed pods
- Short supply lists using things you likely already own
- Step by step instructions written for slow, unhurried evenings
- Preservation tricks that keep autumn materials from crumbling by December
- Styling notes for shifting each piece from Samhain into deep winter
- Ideas for gifting the pieces you end up making twice
Why Samhain Crafts Make the Loveliest Winter Decor
Samhain sits at the hinge of the year, the moment the harvest ends and the dark half begins. Anything made from that threshold already holds both seasons inside it.
Rust and bone and bare branch read as autumn in October and as quiet winter in January. The materials do not change, only the light around them.
Working with foraged pieces also means learning to dry flowers and herbs properly, which is the single skill that decides whether your decor lasts one week or three months.
Waxed Leaf Garland
The wax seals in color and suppleness, so leaves that would curl to dust by November stay glossy and pliant into spring.
What You’ll Need
- Fresh fallen leaves in oak, maple, or beech, gathered while still flexible
- Beeswax or old candle stubs, roughly one cup melted
- Natural twine and a small clothespin or two
- Parchment paper for drying
Instructions
- Melt the wax gently in a double boiler until fully liquid but not smoking.
- Hold each leaf by the stem and dip it fully, coating both sides in one smooth motion.
- Lay the leaves on parchment and let them cool until the surface turns matte.
- Tie each stem to the twine at uneven intervals, letting the garland dip and swag naturally.
Hang it across a doorway now, and add a few sprigs of cedar to it in December.
Dried Orange and Apple Strand
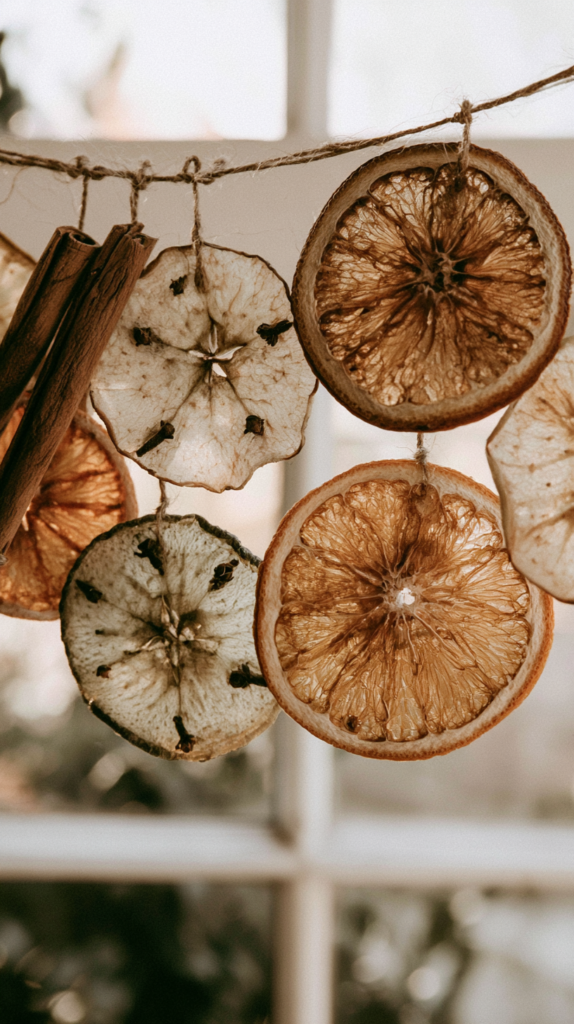
This one perfumes the whole room while it dries, which is half the reason to make it.
What You’ll Need
- Two or three oranges and two firm apples, sliced thin
- Whole cloves and a few cinnamon sticks
- Baking sheet lined with parchment
- Waxed thread and a large blunt needle
Instructions
- Slice the fruit about a quarter inch thick and pat every slice dry with a towel.
- Bake at 200 degrees for two to three hours, flipping once, until the slices feel leathery.
- Thread the cooled slices onto the waxed thread, alternating with cinnamon sticks.
- Hang somewhere with airflow to finish drying for another day.
The strand reads as harvest abundance in October and as spiced Yule warmth by December.
Foraged Twig Star
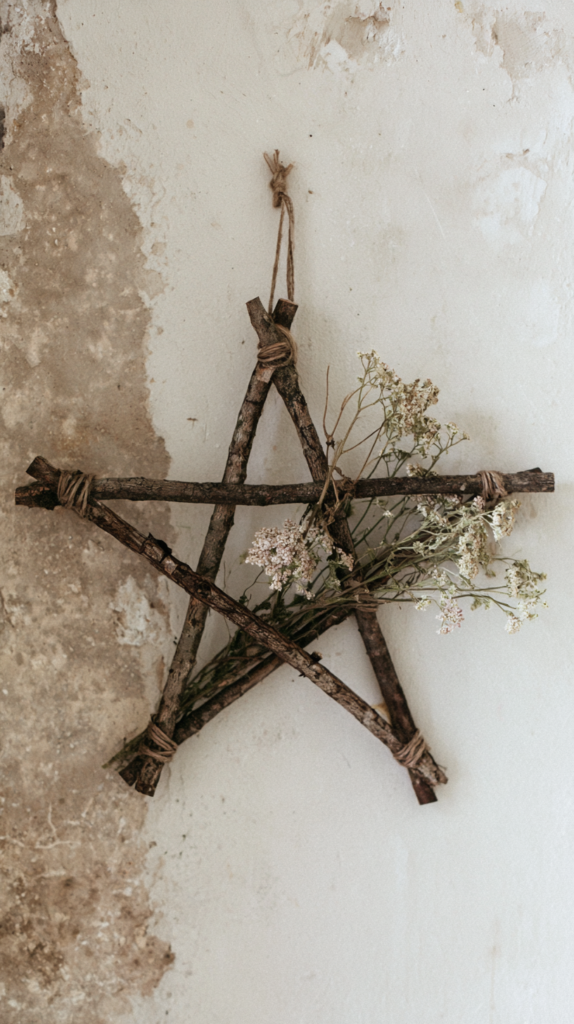
A five pointed star of bare branch is one of the oldest protective shapes in folk craft, and it costs nothing but an afternoon.
What You’ll Need
- Five straight twigs of similar thickness, roughly ten inches each
- Waxed linen cord or thin jute
- Small pruners
- Dried yarrow or bittersweet for accent
Instructions
- Trim all five twigs to matching length and let them dry indoors for a day.
- Lay them into a star shape, overlapping each end about an inch past the joint.
- Bind every crossing point with figure eight wraps of cord, finishing with a tight knot.
- Tuck a sprig of dried yarrow into one joint and hang from a single point.
If this shape pulls at you, the same binding technique opens up dozens of simple twig craft ideas for the rest of the dark season.
Acorn Cap Candle Cluster
Tiny floating flames in acorn caps look like something left behind by the fair folk.
What You’ll Need
- Twenty or so large acorn caps, cleaned and fully dried
- Beeswax pellets and a length of thin cotton wick
- A shallow bowl or wood slice for the base
- Tweezers
Instructions
- Melt beeswax pellets in a double boiler
- Cut wick into half inch pieces and set one upright in each cap with tweezers.
- Pour melted beeswax into each cap just to the rim and let it set for an hour.
- Arrange the finished caps in a cluster on your base, tallest elements toward the back.
Here is a full tutorial:
Set the cluster on a rustic fall altar in October, then move it to the winter windowsill when the days shorten.
Cedar and Herb Bundles
These hang beautifully, smell like a forest floor, and burn cleanly when you finally want the smoke.
What You’ll Need

New from Wild Enchantment
Wheel Of The Year Gathering
8 nature crafts & seasonal rituals for each turning of the year, using what the season is already giving you.
- Cedar or juniper tips, a generous handful
- Rosemary, mugwort, or bay, whatever finished the summer strong
- Cotton twine in a natural color
- Kitchen shears
Instructions
- Lay the longest cedar sprigs down first as the spine of the bundle.
- Layer the softer herbs on top, staggering the tips so the shape stays tapered.
- Wrap twine tightly from the base upward, then criss cross back down and knot.
- Hang stem side up in a dry spot for two weeks before using or gifting.
Pressed Fern Window Panel
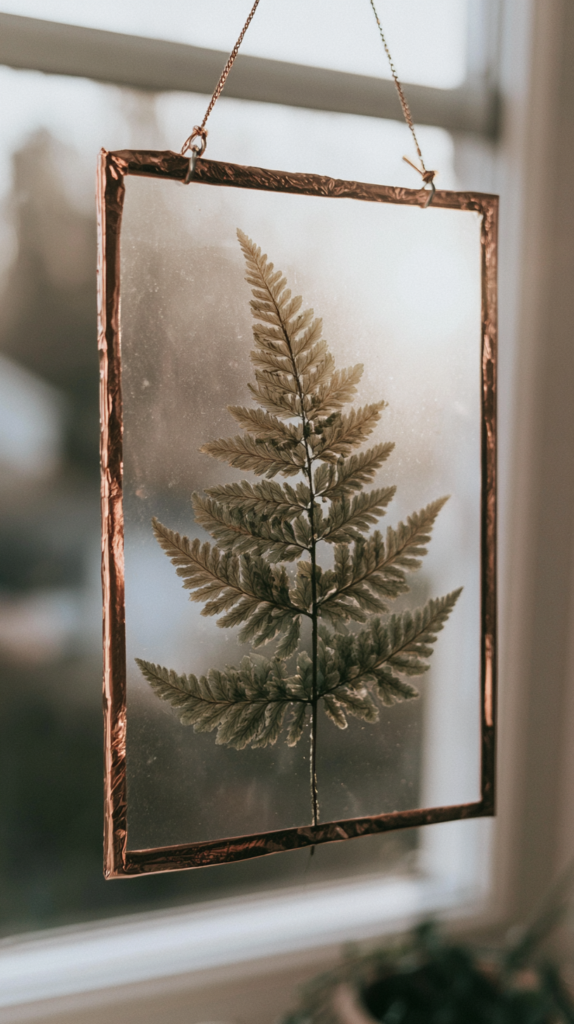
Light through a pressed frond turns an ordinary window into something closer to stained glass.
What You’ll Need
- Ferns, ivy, or skeleton leaves, pressed flat for at least a week
- Two sheets of glass from thrifted frames, same size
- Copper foil tape or narrow washi in a dark tone
- Fine tweezers
Instructions
- Arrange the pressed material on one glass sheet, leaving generous open space.
- Lay the second sheet over it slowly, pressing from one edge to avoid shifting.
- Seal all four edges with foil tape, folding it evenly over front and back.
- Add a small wire loop at the top and hang where morning light hits.
Wood Slice Symbol Ornaments
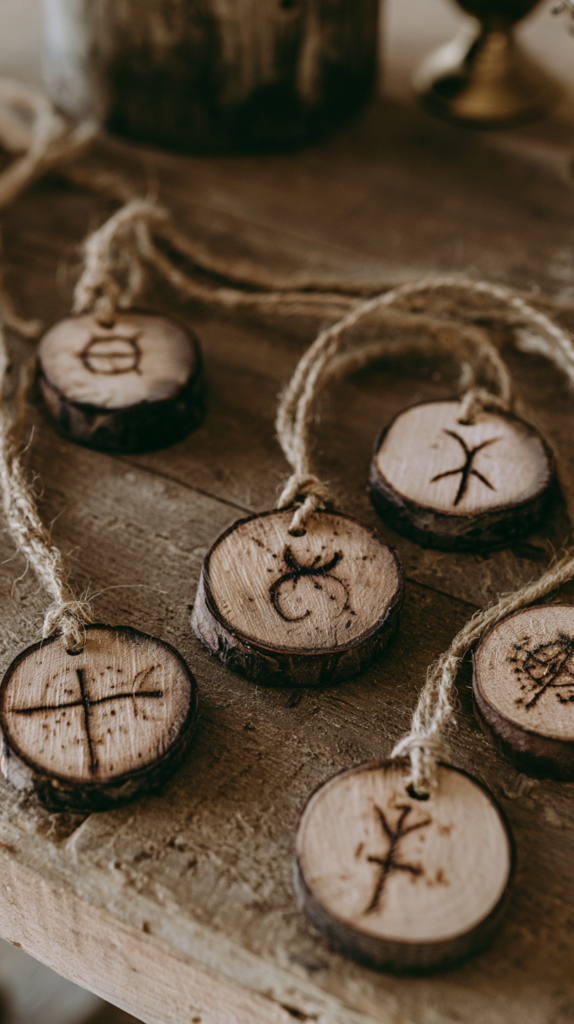
Simple, endlessly repeatable, and the first thing people ask you to make for them.
What You’ll Need
- Wood slices roughly two inches across, sanded smooth
- A wood burning pen or a fine black paint marker
- Jute cord cut into eight inch lengths
- A small drill bit or awl
Instructions
- Sand each slice on both faces and wipe the dust away with a dry cloth.
- Burn or draw one symbol per slice, keeping the design spare and confident.
- Make a hole near the top edge and thread the jute through, knotting the ends.
- Seal with a thin coat of beeswax polish if you want a soft sheen.
There are dozens more directions to take these once you get going, and plenty of wood slice craft ideas that use the same offcuts.
Seed Pod and Feather Mobile

Milkweed pods, lotus heads, and poppy husks all hold their shape indefinitely once dried.
What You’ll Need
- A found branch about eighteen inches long
- Assorted dried seed pods and ethically gathered feathers
- Waxed cord in varying lengths
- A hot glue gun for stubborn pieces
Instructions
- Lay the branch flat and plan your hanging lengths before tying anything.
- Attach each cord with a clove hitch, spacing them unevenly across the branch.
- Tie or glue one pod or feather to the end of each cord.
- Hang the branch from two points so it balances level.
Beeswax Pinecone Fire Starters
Practical, gorgeous piled in a basket, and the easiest handmade gift on this list.
What You’ll Need
- Open pinecones, baked dry at 200 degrees for an hour
- Beeswax or soy wax and a pouring vessel
- Cotton wick and a scrap of muslin
- Dried lavender or orange peel for scent
Instructions
- Tie a length of wick around the base of each cone, leaving three inches loose.
- Sprinkle dried lavender or peel across the melted wax surface.
- Dip each cone twice, letting the first coat set before the second.
- Cool on parchment, then bundle in muslin and tie with twine.
Style Tips and Variations
Keep everything in one narrow palette. Rust, bone, soot, and dried moss will carry the whole collection through both seasons without ever looking mismatched.
Swap accents rather than whole pieces. Bittersweet and dried grasses in October become cedar, juniper berry, and white pine in December.
Many of these projects overlap with winter solstice nature crafts, so making a double batch now saves you a scramble later.
Age your materials on purpose. A slightly weathered pod or a leaf with a torn edge reads as honest, and honest is the entire aesthetic.
Closing Reflection
There is something quietly radical about decorating your home with things that cost nothing and will one day return to the ground.
Samhain asks you to sit with endings, and these crafts let you hold that thought in your hands for a whole season.
Gather slowly. Make one thing this week, and let the rest of the dark half of the year fill in around it.
From Wild Enchantment
Sell What Your Hands Create
The complete companion for turning your handmade crafts into real income at markets and online. What to make, what to charge, and where to sell it.
Get the Kit