This post may contain affiliate links, including those from Amazon Associates. If you make a purchase through these links, I may earn a commission at no additional cost to you. Learn more about our affiliate policy.

Why Salt Dough Is Perfect for Solstice Ornaments
Salt dough connects us back to an old-world way of crafting. It doesn’t rely on fancy tools or expensive materials, only what you already have and a bit of imagination. There’s a humbleness to it, a reminder that beauty doesn’t have to be bought.
For the Winter Solstice, this medium feels especially fitting. The Solstice is about slowing down, honoring simplicity, and finding magic in the ordinary.
Creating with salt dough mirrors that energy. It’s hands-on, sensory, and quiet. As you knead the dough, you can infuse it with intention: gratitude for the year behind you, hope for the one to come, and trust in the light’s slow return.
You don’t need to be an artist to make something meaningful. These ornaments are forgiving and rustic by nature. Their charm lies in their imperfection.
For more inspiration on handmade seasonal gifts that carry the same slow, intentional energy, explore these easy Winter Solstice nature crafts that double as gifts.
What You’ll Need and the Basic Recipe

The base ingredients are simple pantry staples:
- 2 cups all-purpose flour
- 1 cup fine salt
- ¾ cup warm water
You’ll also need a few basic tools:
- Mixing bowl
- Wooden spoon
- Rolling pin
- Parchment paper
- Cookie cutters or a small knife
- Baking sheet
- Straw, skewer, or toothpick (for making hanging holes)
To make the dough:
1. Mix the dry ingredients
Combine the flour and salt in a large bowl and stir until they’re fully blended.
2. Add the warm water gradually
Pour the water in a little at a time while mixing. This helps the dough come together evenly and prevents clumping.
3. Knead the dough
Once it forms a rough ball, move it to a lightly floured surface. Knead for a few minutes until the texture becomes smooth, flexible, and easy to shape.
4. Adjust the consistency
- If the dough feels dry or crumbly, sprinkle in a small amount of water.
- If it feels sticky, dust it with a bit more flour. Aim for a soft, steady dough that rolls out cleanly and holds detail well.
Crafting Step-by-Step for Winter Solstice Magic
Step 1: Roll And Shape
Once your dough is ready, roll it out on parchment or a lightly floured surface to about a quarter inch thick. From here, you can shape it in several ways:

Cutting by Hand or with Cookie Cutters
Use cookie cutters for moons, stars, trees, or circles. These shapes echo the rhythms of the season and hold intention beautifully.
Using Molds
Press the dough gently into silicone molds for detailed, embossed designs. Ease each shape out carefully so the edges stay crisp.
Here is a full tutorial for this mold method from Miss Mustard Seed:
Freehand and Natural Imprints
For a more organic feel, cut shapes freehand with a knife or press natural textures into the dough before baking. Pine needles, cedar sprigs, cinnamon sticks, or even the end of a pinecone will leave beautiful imprints that feel rooted in the season.
Optional: Infuse With Spices
Blend a teaspoon or two of warm spices like cinnamon, clove, nutmeg, or ginger into the dough before shaping. This adds gentle color and a wintery scent.
Remember to make a small hole near the top of each ornament with a straw or toothpick so they can be hung later.


Step 2: Bake or Air-Dry
Place the ornaments on a parchment-lined baking sheet and bake at a low temperature, around 200°F, for 2 to 3 hours, or until they feel completely dry and hard to the touch.
If you prefer, you can also let them air dry for several days. This takes longer but gives the ornaments a slightly more natural color and texture. Once they’re dry, allow them to cool completely before decorating.
Step 3: Paint and Decorate

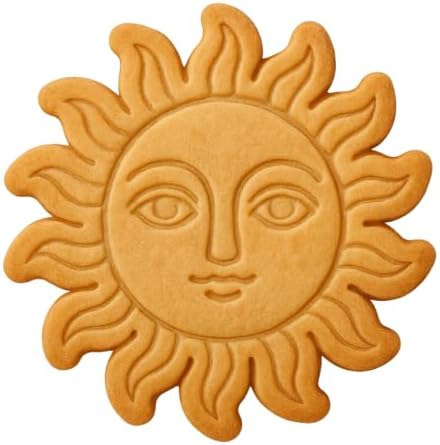
This is where your creativity can flow. Use acrylic paints or watercolors to add color, or leave them unpainted for a natural, earthen look. For Solstice symbolism, you might try painting spirals, sun wheels, or moon phases—simple marks that speak to the cycle of light and shadow.
Gold and white paints add a touch of brightness, while earth tones keep them rustic. You can also add a touch of shimmer with mica powder or a light dusting of cinnamon before baking for a subtle scent.
Once dry, you can seal the ornaments with clear varnish or matte Mod Podge to make them last for years.
For more inspiration on handmade seasonal gifts that carry the same slow, intentional energy, explore these easy Winter Solstice nature crafts that double as gifts.

Step 4: Add the Finishing Touches
Thread twine, jute, or ribbon through the holes and tie a loop for hanging. Natural fibers like hemp or cotton give a grounded, handmade feel, while velvet or silk ribbon can make them feel more elegant.
Hang them on your Yule tree, mantle garland, or near your Solstice altar. You can even tie them to gifts as meaningful, handmade tags.
Each ornament becomes a small vessel for your intention, a physical reminder of the season’s themes—light returning, rest, and renewal.
Creative Variations for Solstice
Once you’ve made your base batch, you can play with a few variations that deepen the symbolism and beauty.
Spiral Ornaments: Press a spiral pattern into a circular piece of dough using the end of a chopstick or paintbrush handle. The spiral has long symbolized life’s journey, inward reflection, and the turning of the year.
Moon Phase Set: Shape small discs and paint each one as a different moon phase. String them together after baking to create a hanging garland that honors the lunar rhythm of the Solstice.
Herbal Imprints: Press sprigs of rosemary, thyme, or pine into the dough for texture. Once baked, brush the raised surfaces lightly with metallic paint to highlight the pattern.
Scented Dough: Mix a teaspoon of cinnamon or ground clove into the dry ingredients before adding water. The color will deepen to a warm, golden brown, and the ornaments will carry a subtle winter scent.
Elemental Symbols: Carve or stamp simple symbols representing earth, air, fire, and water. These can hang near your altar or be used in future rituals as grounding tools.

Troubleshooting and Tips
If the ornaments puff or crack while baking, lower your oven temperature slightly and bake longer at the same low heat. This allows the moisture to evaporate slowly and evenly.
Keep the thickness consistent so everything dries at the same rate. If your dough feels sticky, add flour in small amounts until it holds shape. If it feels too dry or crumbly, add a few drops of water.
When sealing, let the paint dry completely before applying varnish. Store finished ornaments wrapped in tissue with a small silica packet to prevent moisture damage over time.
Remember that salt dough is not edible and should be kept away from pets or children who might mistake it for food.
Bringing It Into Your Solstice Ritual
Making these ornaments can be more than just a craftm it can become part of your winter solstice rituals. Set aside an afternoon or evening for the process. Play soft music, light candles, and let the rhythm of mixing, rolling, and decorating become meditative.
If you’re celebrating with loved ones, invite them to make one ornament each, writing a word or drawing a symbol of what they wish to carry into the coming year. Hang them all together to create a shared intention tree or garland.
If you’re creating alone, let the quiet become part of the magic. Notice the sound of the dough as you knead, the scent of salt and flour, the steady hum of the oven. These small, sensory details anchor you in the present moment.
When the ornaments are finished, hang them mindfully. As you tie each one, whisper a blessing that aligns with your intention. Let the act of decorating become a ritual in itself.
To deepen your seasonal practice, you can also explore Winter Solstice rituals to welcome back the light and weave your ornaments into your sacred winter space.
Closing Reflection
Crafting salt dough ornaments for the Winter Solstice is a return to simplicity. It’s not about perfection or elaborate materials, but about presence. Mixing, shaping, and baking become an offering to the season—a way to mark the turning of the light and give form to your quiet hopes.
These ornaments carry both memory and meaning. Over time, you can build a small collection that tells the story of your winters past, each one infused with the energy of the hands that made it.
When you hang them this year, let them remind you that creation itself is magic. You don’t have to search far to find it. It lives in your kitchen, your fingertips, and the slow unfolding of light returning once again.