This post may contain affiliate links, including those from Amazon Associates. If you make a purchase through these links, I may earn a commission at no additional cost to you. Learn more about our affiliate policy.
Natural materials carry a kind of visual weight that feels calming and steady. Twigs, in particular, bring in an organic texture that softens a space without overwhelming it. They connect everything back to the earth in a way that feels grounded rather than styled.
On an altar, this matters. It creates a sense of cohesion between your candle, your greenery, and any other elements you’ve gathered. Instead of feeling like separate pieces, everything begins to belong together.
There is also something reassuring about the imperfect nature of twigs. They are not uniform, and they are not meant to be. This removes the pressure to create something flawless and allows you to focus on the act of making.

If you enjoy working with gathered branches, these simple DIY twig craft ideas offer more ways to use twigs in small, meaningful home projects.
What You’ll Need
This project is meant to be simple and flexible. You can adjust based on what you already have.
- A small glass jar or votive
- Straight twigs or small branches
- Twine or jute string
- Hot glue or strong craft glue
- Clippers or scissors
- A tealight or small candle
Optional additions:
- Faux moss for added texture
- A small amount of white or neutral paint
- Dried herbs or greenery
Many of these materials can be found outdoors or repurposed from items you already own. This keeps the process accessible and easy to repeat.
How To Gather the Right Twigs
Start by collecting more twigs than you think you’ll need. This gives you options when it comes to size, shape, and texture.
Look for pieces that are relatively straight and similar in thickness. They do not need to match perfectly, but having some consistency helps the finished piece feel cohesive. Dry twigs are usually easier to work with, as they are lighter and less likely to bend.
As you gather, notice the small variations in color and texture, especially if you want to explore more witchy twig wreath ideas later.
Step 1: Prepare Your Base
Take your glass jar and make sure it is clean and fully dry. Hold a few twigs up against the side to get a sense of the height you want.
You can trim them to sit flush with the top of the jar for a cleaner look, or leave slight variation for a more natural finish. Both approaches work, so choose what feels right for your space.
This step is less about precision and more about getting a visual sense of balance before you begin attaching anything.
Step 2: Cut and Arrange the Twigs

Trim your twigs to your desired length and lay them out side by side. This gives you a chance to see how they will look once attached.
Arrange them so the thickness and spacing feel even without becoming rigid. Slight variation creates a more organic look, while tighter spacing creates a fuller appearance.
Taking a moment here helps prevent the piece from feeling rushed. It also allows you to adjust before anything is permanent.
Step 3: Attach the Twigs

Begin attaching the twigs one at a time using glue. Apply a line of glue along the length of each twig, then press it firmly onto the jar.
Work slowly around the surface, keeping the twigs aligned as you go. It helps to attach them in small sections rather than trying to complete the entire jar at once.
Make sure the tops of the twigs sit below the flame line of your candle for safety. This small detail keeps the piece both beautiful and functional.
Step 4: Wrap and Finish
Once all the twigs are attached, wrap twine around the jar to bring everything together. You can wrap it near the top, the center, or both depending on the look you prefer.
Tie a simple knot and secure it with a small amount of glue if needed. This step adds structure and a finished feel without taking away from the natural texture.
At this point, your candle holder is complete. You can leave it as is or add a small detail if you want to personalize it further.
Here is a full tutorial for a simple twig candle holder:
Optional Styling Variations
Whitewashed Woodland Look

- Lightly brush twigs with diluted white paint
- Allow the natural texture to show through
- Creates a softer, lighter finish for spring
This works well if your altar leans toward lighter tones or if you want a more airy feel.
Earthy Natural Finish
- Leave the twigs completely raw
- Focus on the natural variation in color and texture
- Keep the overall look simple and grounded
This version feels closest to the materials themselves and pairs easily with greenery and stone.
Moss-Wrapped Woodland Style

- Tuck small pieces of faux moss between select twigs
- Or wrap a thin strip of moss around the base or center
- Secure lightly with twine or a small amount of glue
This adds depth and a forest-like texture that feels layered without becoming overwhelming, much like other enchanting DIY nature crafts made from simple gathered materials.
Subtle Gold-Dipped Ends
- Paint just the tips of a few twigs
- Keep the detail minimal and intentional
This creates a slight contrast while still allowing the natural materials to lead.
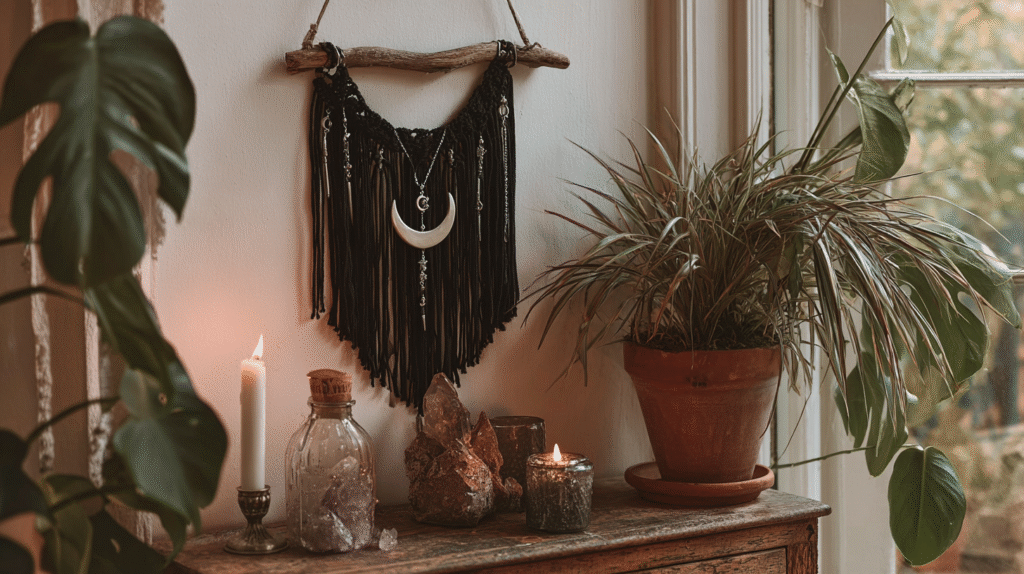
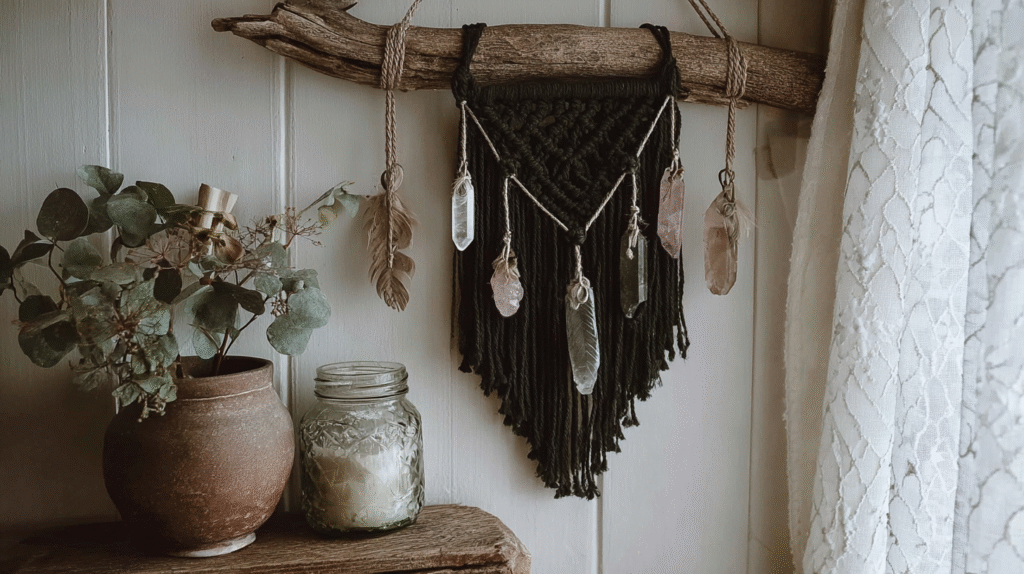
How To Style It on Your Altar
Place your candle holder where it can naturally anchor the space. It can sit at the center or slightly off to one side depending on your layout.
Pair it with a few simple elements such as a small stone, a sprig of greenery, or inspiration from these spiritual altar ideas for every season.
When you light the candle, the texture of the twigs catches the light in a subtle way. This is what creates the atmosphere without needing anything more.
Making It Feel Like Your Own
It’s easy to compare what you create to what you’ve seen elsewhere. This is where many people stop before they begin. Instead, focus on what feels natural to you.
You might add a small herb tucked into the twine or choose twigs with more variation, especially if you enjoy creating witchy nature crafts to make and sell. You might keep it very minimal or add a bit more texture with moss. There is no single right way for it to look.
What matters is that you made it. That alone changes how it feels in your space.
Common Mistakes to Avoid
- Using twigs that are too curved or uneven
- Overfilling the design with too many materials
- Rushing the placement without checking alignment
- Making the twigs too tall for the candle
Keeping the design simple and balanced helps the final piece feel more intentional.
Closing Reflection
There is a difference between saving an idea and bringing it into your life. This project gives you a way to close that gap in a simple, tangible way.
You don’t need a full transformation of your space to feel more connected to it. Sometimes it begins with one small object, something you created yourself, placed exactly where it belongs.
Let this be a starting point. A reminder that you can shape your surroundings with what you already have, one piece at a time.
New from Wild Enchantment
Sell What Your Hands Create
The complete companion for turning your handmade crafts into real income at markets and online. What to make, what to charge, and where to sell it.
Get the Kit